


Editorial date: November 19, 2026. First added to RigPeak: November 20, 2026. Updated November 20, 2026. This guide is based on the cited documentation and editorial analysis; it is not a hands-on test report.
Zenless Zone Zero rewards a team whose members create opportunities for one another. Start by understanding how your three Agents enter the fight, which one deals the damage you rely on and what makes that damage window possible.
A good early squad is one you can operate consistently. You can explore specialized teams after its basic actions make sense.
1. Learn defense alongside attacks
Use the opening commissions to practice movement, dodging and assists. Adjust the controls if you cannot reach a defensive command comfortably.
Watch the enemy cue before reacting. Practice a well-timed dodge, then the follow-up the tutorial introduces. When an assist is available, learn when the incoming Agent can answer the attack.
The official game description presents switching and coordinated combat as central features. Staying on one Agent and repeatedly pressing attack misses much of that toolkit.
In a practice encounter, focus on surviving one enemy sequence without taking unnecessary hits. Only then extend your own combo. Consistent defense creates more useful attacking time.
2. Give the squad a clear damage plan
Identify your main damage source and what the other Agents add. One may build Stun, another provide a useful effect, and another exploit the opening. Some squads instead organize around Attribute Anomaly interactions.
Read each Agent's Core Passive and Additional Ability. Check the actual activation condition rather than assuming shared faction or attribute always solves it for every character.
The early Anby, Nicole and Billy lineup is a useful learning example if those Agents are available on your account: inspect their respective roles, prepare an opening and pass control deliberately. It is a way to learn the interaction, not a claim that the same team is best for every activity.
3. Distinguish Daze from Attribute Anomaly
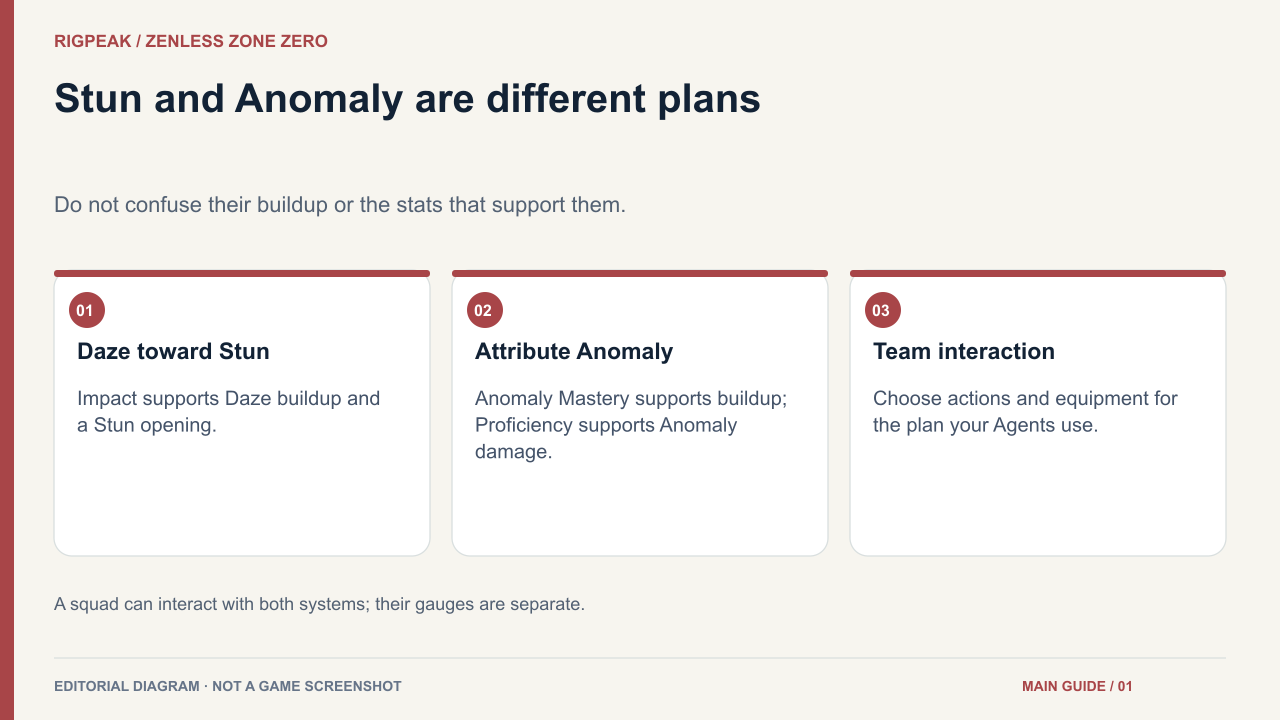
Daze builds toward Stun. Attribute Anomaly buildup belongs to a separate system and produces an attribute-related effect. A squad may interact with both, but they are not the same progress bar.
Impact supports Daze buildup. Anomaly Mastery relates to buildup, while Anomaly Proficiency relates to Anomaly damage. The Agent attribute reference explains these basic distinctions.
That difference changes how you judge equipment. An attribute useful for an Anomaly-focused damage plan may do little for the job you assigned a Stun Agent.
During a fight, watch which system creates your intended opportunity. If you cannot explain why a target is vulnerable, slow the sequence down and observe the gauges.
4. Turn Stun into useful attacking time
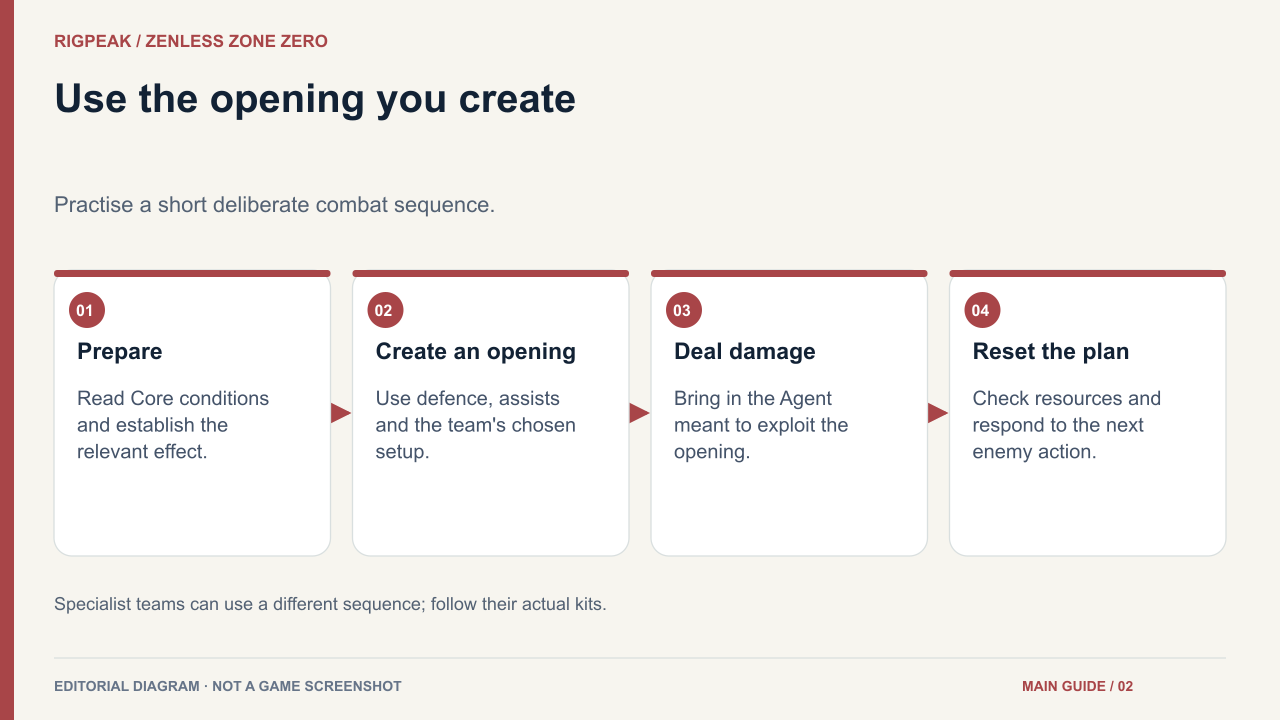
For a team built around Stun, prepare the opening and then bring in the Agent meant to exploit it. Follow the Chain Attack prompts and your characters' specific conditions.
Avoid spending the entire opening on setup you could have completed earlier. Equally, do not interrupt an essential action merely to switch as often as possible.
Practice a short sequence against a familiar enemy: establish the relevant effect, build the opening, then use your damage dealer's key attack. Watch what is ready when the enemy recovers.
Special skills and Ultimate availability should be checked on each Agent's current interface. Do not plan around an old assumption that all resources are shared across the squad.
5. Match the W-Engine to the Agent's job
Read a W-Engine's attributes and passive, including the Specialty condition for its special effect. An impressive rarity does not ensure that the Agent can use the effect you wanted.
After equipping one, confirm that it supports the attacks or utility the Agent actually provides. Develop a useful compatible choice before investing heavily in an unrelated item.
Agent levels, skills, Core development, W-Engines and Drive Discs contribute separately. The Agent progression guide explains those systems.
Prioritize skills used in your real combat sequence. An Agent who contributes a brief support action does not automatically need the same investment pattern as your main on-field damage dealer.
6. Build Drive Discs from function outward
When Drive Discs become relevant, begin with useful main attributes and an effect that fits the Agent. Check the complete set condition before sacrificing stronger relevant attributes for a bonus that rarely activates.
Compare one change at a time against an encounter you know. If the team is missing its intended Additional Ability or damage interaction, better disc rolls alone will not repair the plan.
Protect promising pieces until you understand the inventory and dismantling rules. There is little benefit in turning every early equipment decision into a permanent optimization project.
7. Let the next obstacle set your routine
Follow the current story and unlock instructions, then use the listed sources for the material your next upgrade requires. Inspect reward and entry conditions before spending Battery Charge.
When you fail, identify the cause: missed defensive cues, an ineffective team sequence or insufficient development. Work on that cause before recruiting another Agent or farming unrelated materials.
You have a strong foundation when you can explain each squad member's job, use a defensive response on purpose and convert a created opening into reliable damage.